Here are step-by-step installations instructions for Team Platform with Maven and Artifactory to get the Team Server Build feature up and running. This guide assumes that you have a Windows XP operating system (but it will also work with others) and a JDK 6 already installed.
Maven Installation
First of all we need fully working installation of Maven:
- Download Maven from here for your platform. Maven 2 and 3 are supported but in this guide we will use maven 2.2.1.
- Extract the archive to
D:apache-maven-2.2.1. Set the environment variableM2_HOMEto our Maven installation directory e.g. to
M2_HOME=D:apache-maven-2.2.1
- Add the Maven executable to the
PATHenvironment variable e.g. add
PATH=%PATH%;D:apache-maven-2.2.1bin- Now open a command prompt and type:
mvn -vYou should see some output about the Java and Maven version. If you see that you are good to go.
Artifactory Installation
Now we need an Artifactory installation. First of all download Artifactory from here. We will use Artifactory 2.3.1 in our example.
- Extract the downloaded archive to
D:artifactory-2.3.1- Then start Artifactory by double-click on the startup script:
D:artifactory-2.3.1artifactory-2.3.1binartifactory.batWhen Artifactory is successfully started you can browse to the console at http://localhost:8081/artifactory.
NOTE: For a real production environment you need to start Artifactory as a service. Detailed instructions on how to do that can be found in the Artifactory user guide.
And of course you are running behind an HTTP proxy so you need to tell Artifactory about your proxy settings so it can download the necessary Maven artifacts directly through the internet.
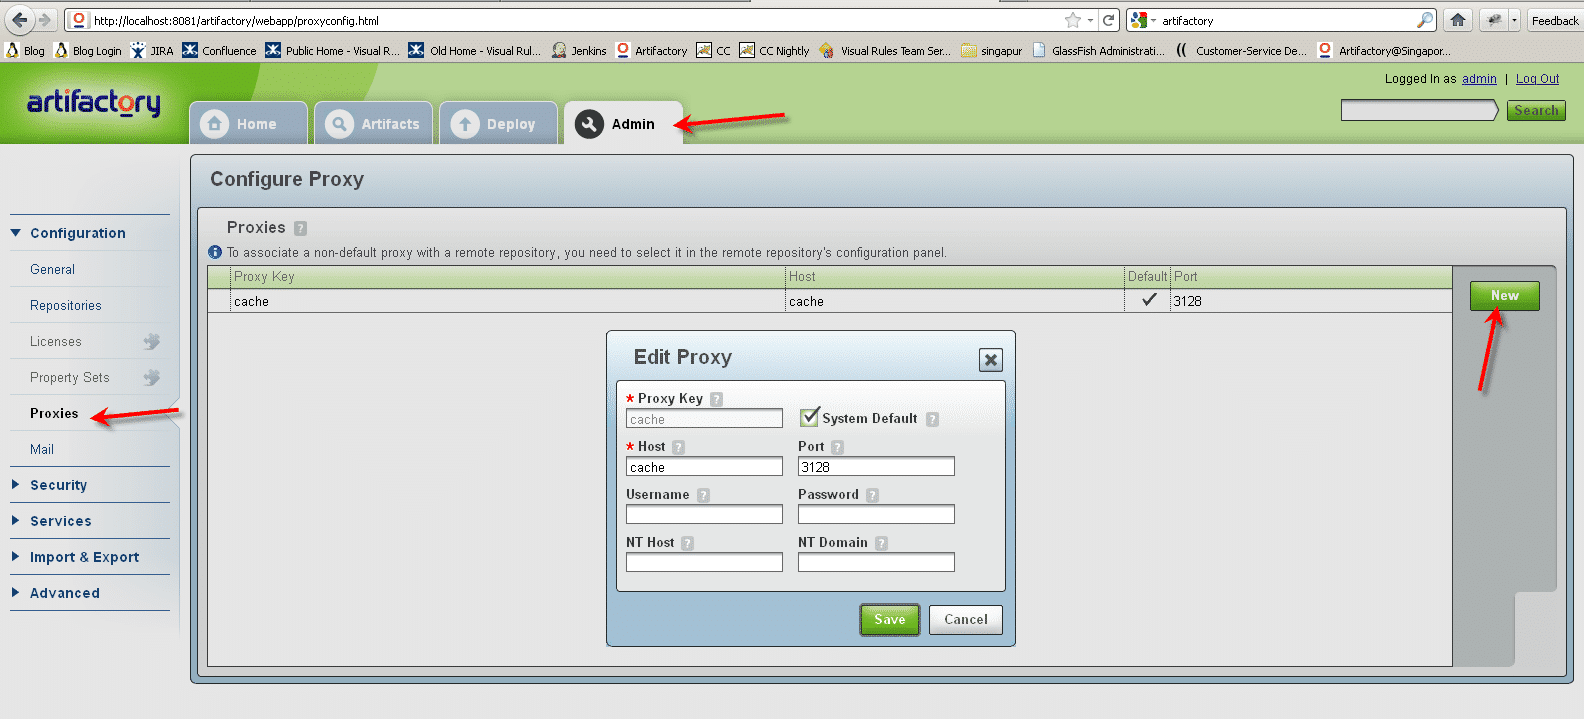
- Login in as admin user first at http://localhost:8081/artifactory/webapp/login.html. Username
adminand passwordpassword. - Then press the “Admin” tab -> Proxies -> New.
See screenshot:
 ©Bosch.IO
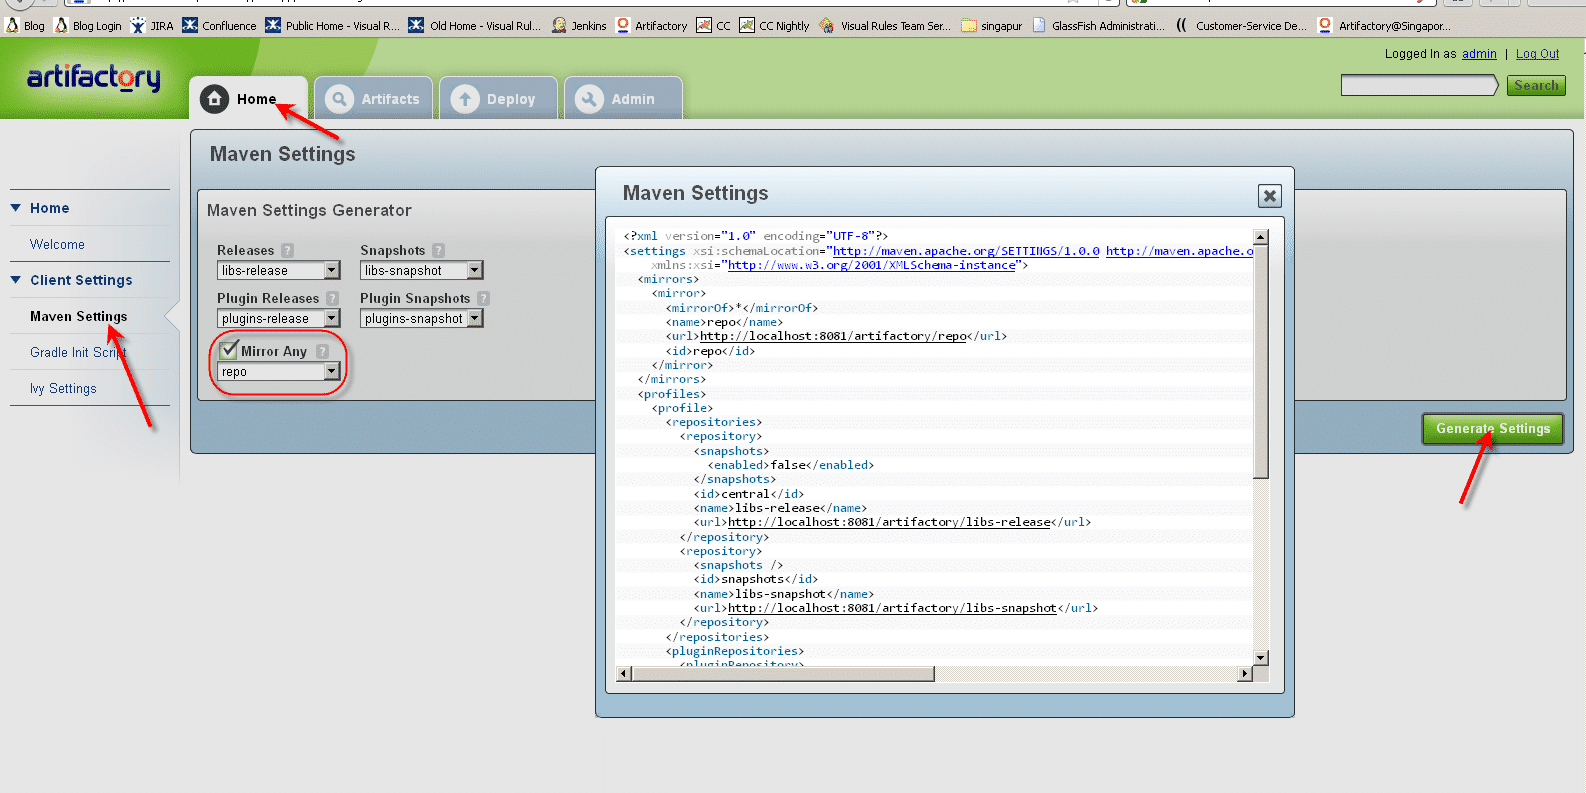
Now we need a Maven settings.xml file that works with our Artifactory installation. We are lucky and can generate one directly from Artifactory:
 ©Bosch.IO
- Download that file and put it in your Maven installation directory under
D:apache-maven-2.1.0conf. Overwrite existing files as needed.
Depending on your Artifactory version you need to insert some additional lines, so our Maven Plugins can be deployed to that Artifactory. Make sure you have the following lines included in your settings.xml file:
  <servers>
	  <server>
	  <id>central</id>
	  <username>admin</username>
	  <password>password</password>
	  </server>
  </servers>
A complete settings.xml file looks like:
<?xml version="1.0" encoding="UTF-8"?>
<settings xsi:schemaLocation="http://maven.apache.org/SETTINGS/1.0.0 http://maven.apache.org/xsd/settings-1.0.0.xsd" xmlns="http://maven.apache.org/SETTINGS/1.0.0"
    xmlns:xsi="http://www.w3.org/2001/XMLSchema-instance">
  <mirrors>
    <mirror>
      <mirrorOf>*</mirrorOf>
      <name>repo</name>
      <url>http://localhost:8081/artifactory/repo</url>
      <id>repo</id>
    </mirror>
  </mirrors>
  <servers>
	  <server>
	  <id>central</id>
	  <username>admin</username>
	  <password>password</password>
	  </server>
  </servers>
  <profiles>
    <profile>
      <repositories>
        <repository>
          <snapshots>
            <enabled>false</enabled>
          </snapshots>
          <id>central</id>
          <name>libs-release</name>
          <url>http://localhost:8081/artifactory/libs-release</url>
        </repository>
        <repository>
          <snapshots />
          <id>snapshots</id>
          <name>libs-snapshot</name>
          <url>http://localhost:8081/artifactory/libs-snapshot</url>
        </repository>
      </repositories>
      <pluginRepositories>
        <pluginRepository>
          <snapshots>
            <enabled>false</enabled>
          </snapshots>
          <id>central</id>
          <name>plugins-release</name>
          <url>http://localhost:8081/artifactory/plugins-release</url>
        </pluginRepository>
        <pluginRepository>
          <snapshots />
          <id>snapshots</id>
          <name>plugins-snapshot</name>
          <url>http://localhost:8081/artifactory/plugins-snapshot</url>
        </pluginRepository>
      </pluginRepositories>
      <id>artifactory</id>
    </profile>
  </profiles>
  <activeProfiles>
    <activeProfile>artifactory</activeProfile>
  </activeProfiles>
</settings>
After saving that file we are ready to deploy our Visual Rules Maven plugins.
Deploy the Visual Rules Maven plugins to Artifactory
Extract the archive of the Visual Rules Maven plug-ins to a temp folder and open the file deploy.cmd with your favorite text editor. Change the Maven repository settings so it fits to our Artifactory installation:
set REPOSITORY_ID=central
set REPOSITORY_LAYOUT=default
set URL=<strong>http://localhost:8081/artifactory/libs-release-local</strong>
set UNIQUE_VERSION=false
set GOAL=deploy:deploy-file
The URL is very important. Make sure you added the “local” repository there and _not_ the virtual one!
After that we can invoke the <code>deploy.cmd</code> in a command prompt:
deploy.cmdCongrats – you have successfully deployed our Maven plugins to Artifactory!
Configuration of Team Platform
We assume that you already installed Team Platform. If you do not know how to do that, refer to the user manual.
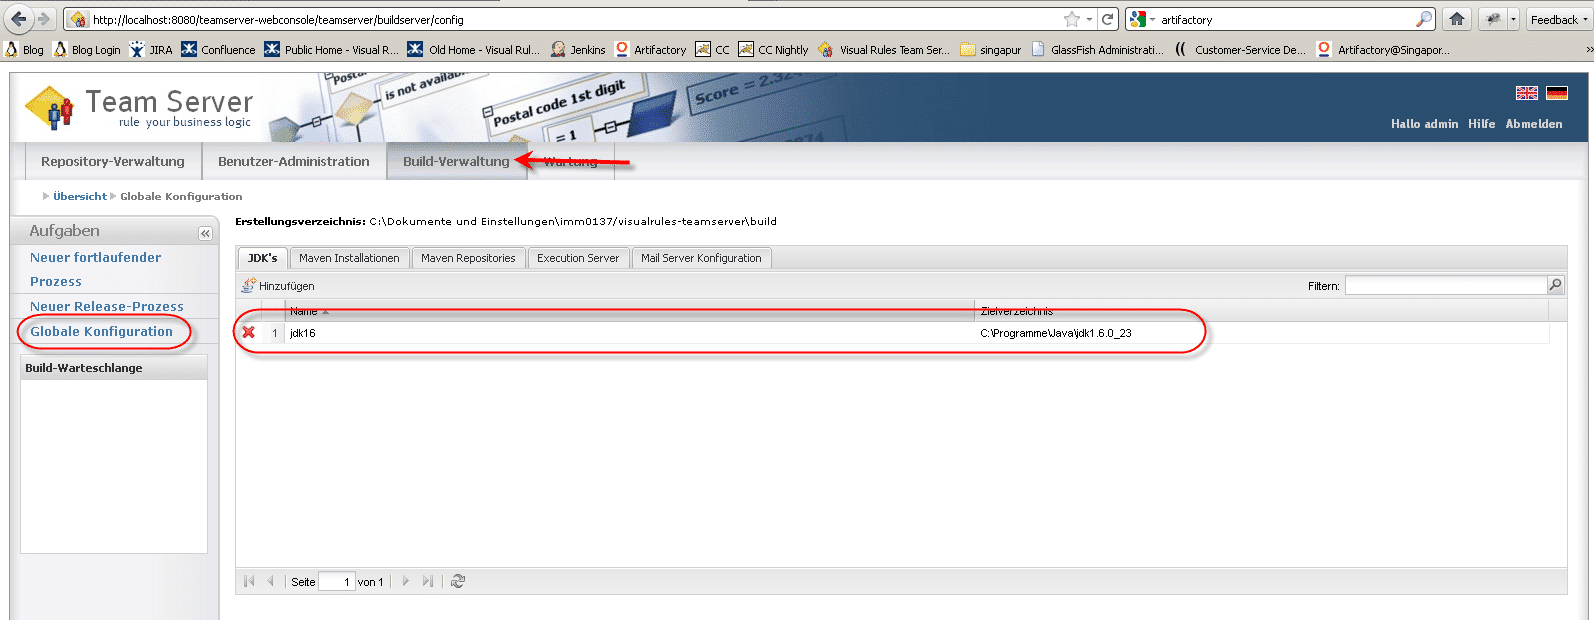
In order to get the Build feature working we must tell Team Server where it can find a JDK and previously installed Maven. And yes you will need a JDK, a JRE will not work!
Some screenshots telling more than thousand words:
 ©Bosch.IO
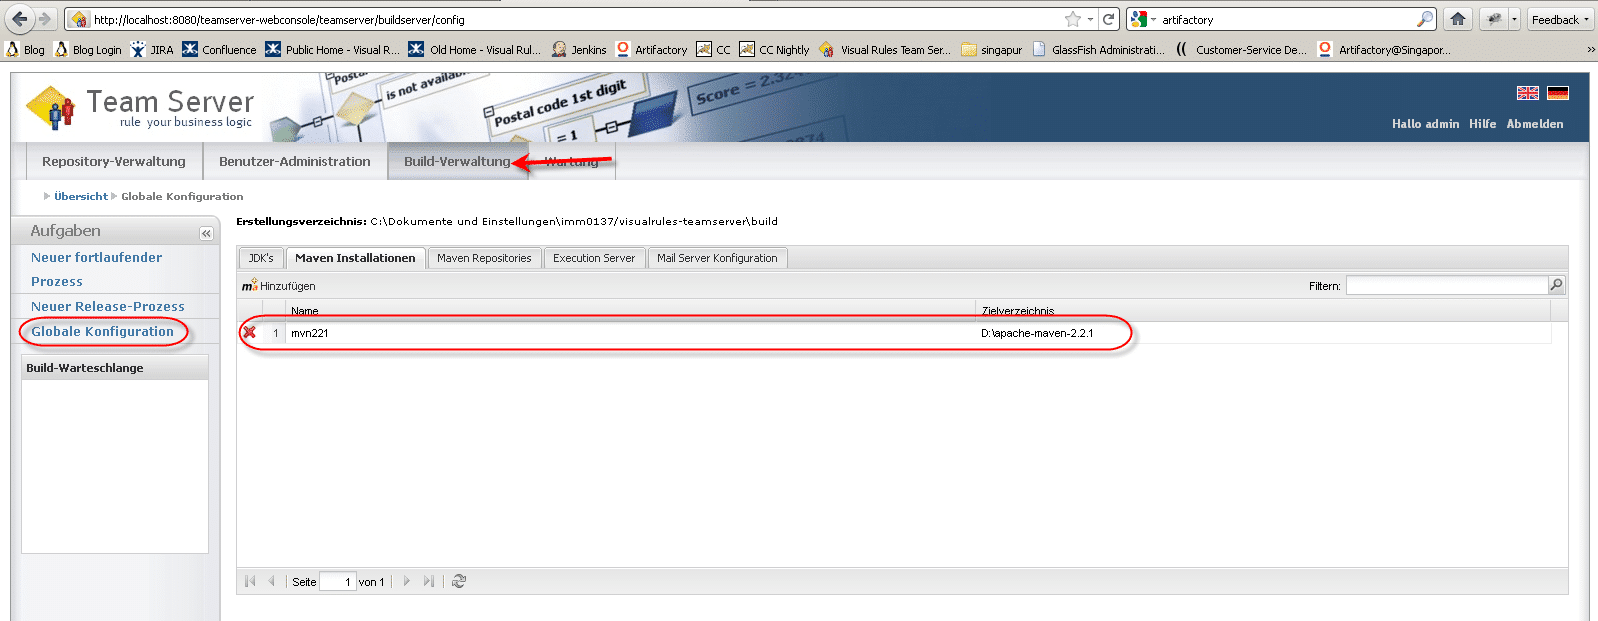
Now configure our Maven installation:
 ©Bosch.IO
And last but not least we have to tell Team Server where it can find our Artifactory:
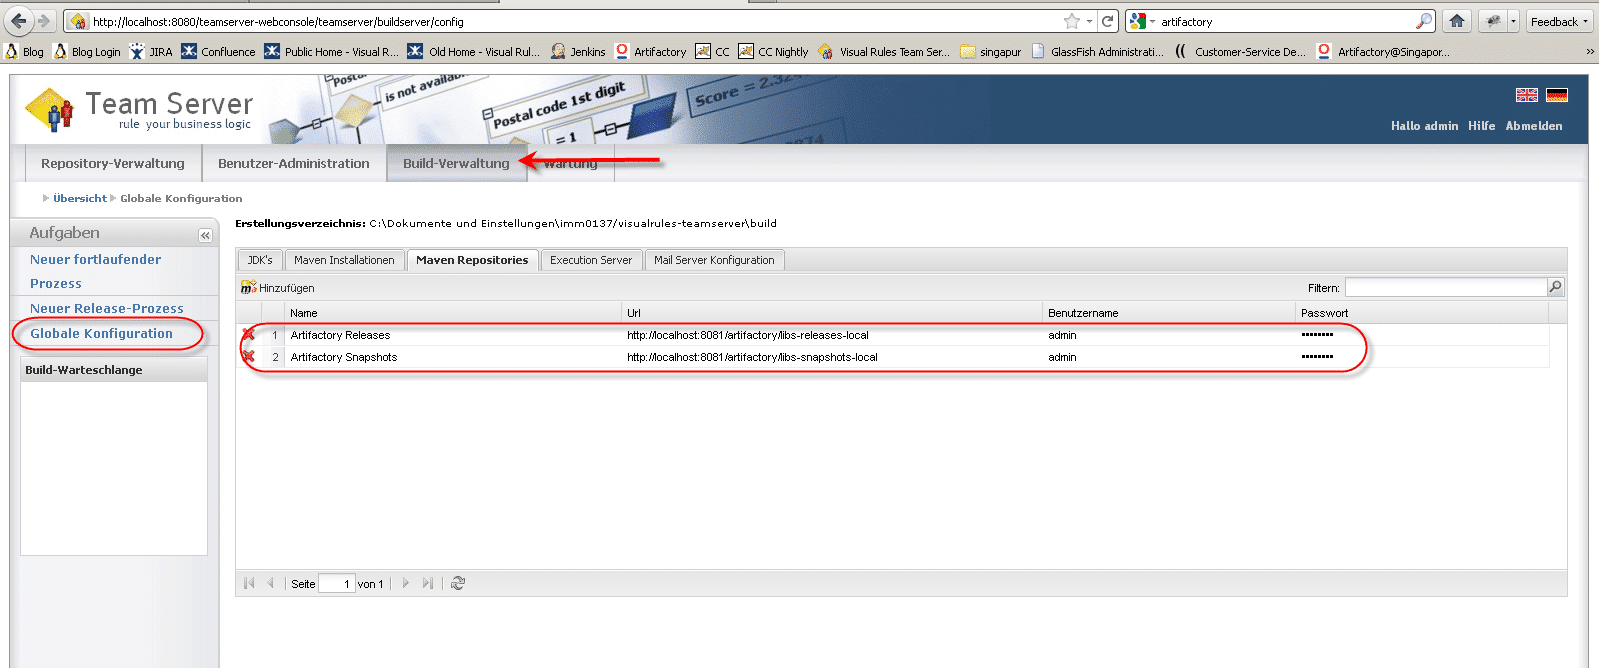 ©Bosch.IO
We used our Artifactory admin user here with username “admin” and password “password”.
Now you are ready to build rule projects on Team Server! Got more questions? Feel free to post your comments below!